Some changes in Mili's room. TA-DA!
What's that you say? It looks like a whole new room? Why thank you! That could be because it
is a whole new room, seeing as we moved to this house in April and I'm pretty sure I never posted a picture of it. Mili's room has been completely rearranged since then, but seeing as there are no "before pictures" you'll just have to assume it was lame then and is
totally AMAZING now.
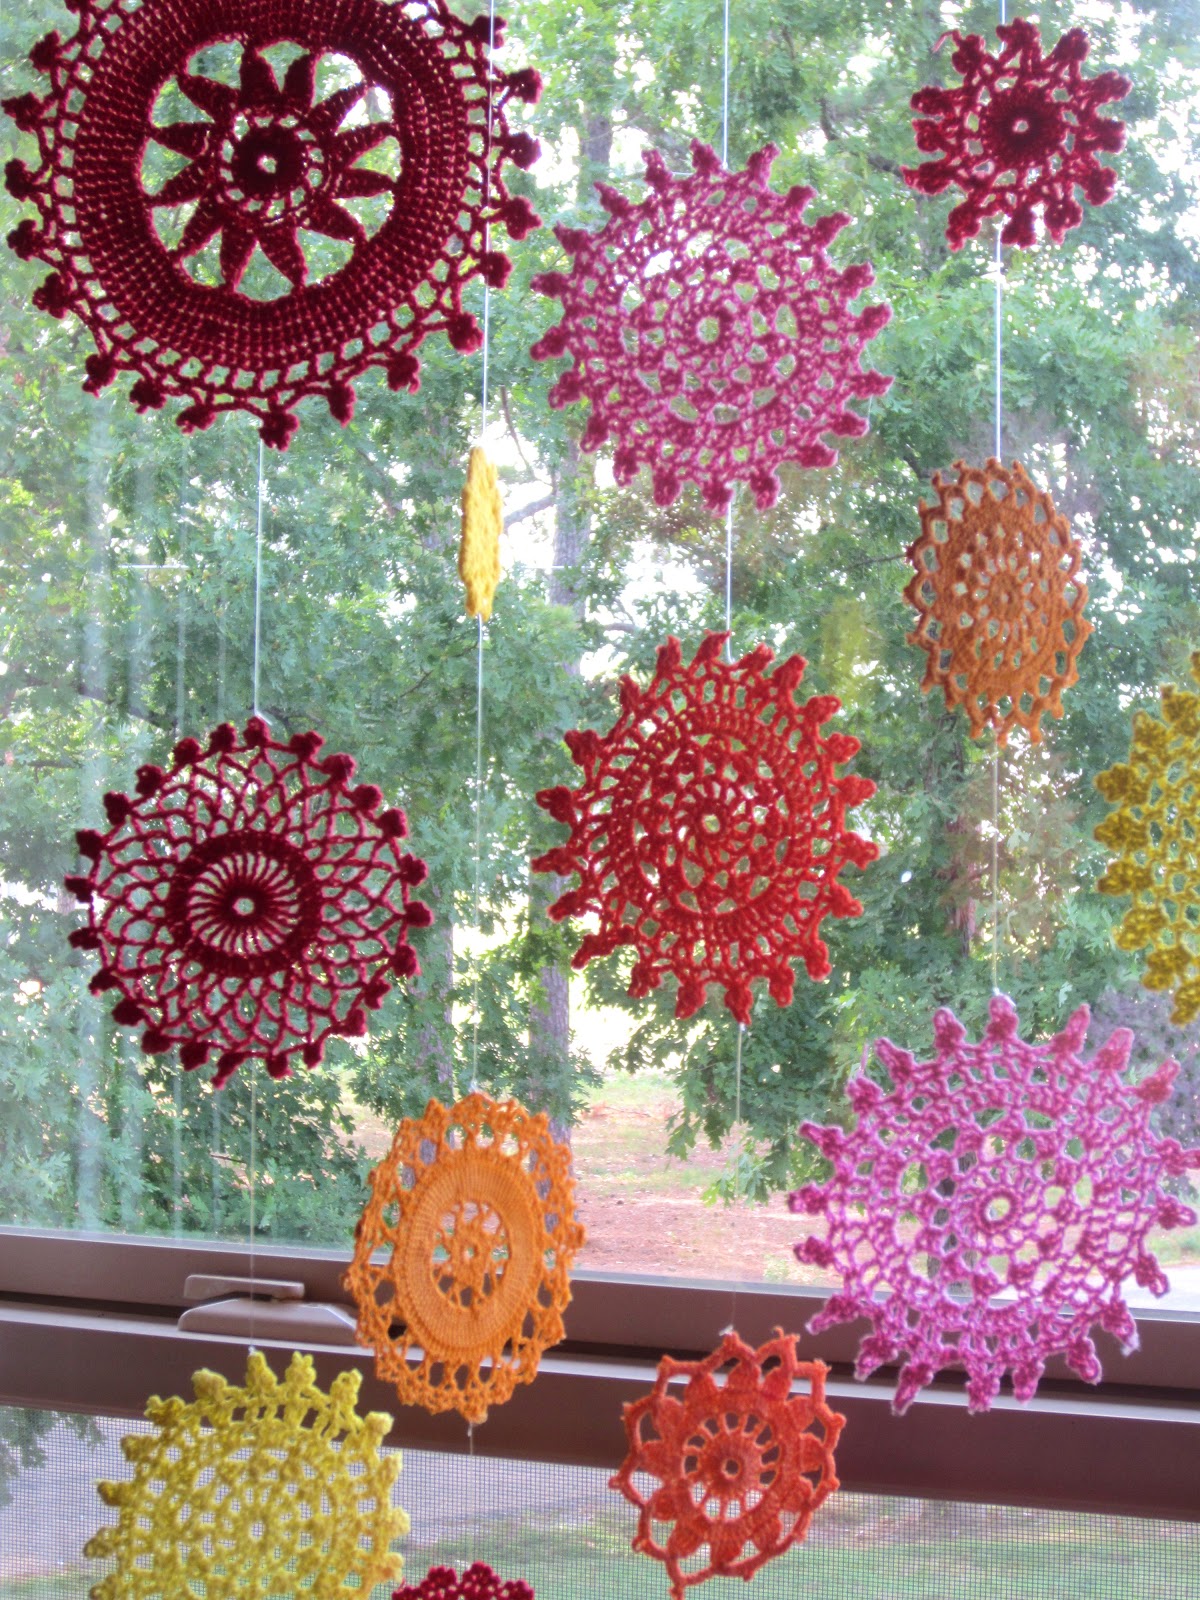
Anyway, I've been adding some color to her room lately. I've decided that while I'm still anti-Princess, I'm not anti-pink, red, purple, colorful, etc. In that spirit, I whipped up this awesome doily sun catcher-mobile.
 |
| Oooh. Ahhhh. |
And by whipped up, I mean worked on haphazardly for weeks until Caleb's sideways, slightly annoyed glances at the counter space the project was taking up morphed into audible polite inquiry. I.E. "So... do you think you'll be finished with this thing soon?" and "So... could you maybe clear off the counter of this uh... stuff... before dinner time?", etc.
...I know. The nerve.
Anyway, you too are now probably itching to have your own doily sun catcher-mobile-garland doohickey, so I made you this sweet tutorial.
Step One: Gather Yo Supplies
Supplies:
- Crocheted doilies
- Fabric Stiffener
- Foam Brush
- Wax Paper
- Illusion Jewelry Cord
- Wooden dowel rod
- Scissors
- Glue gun or super glue
Then head on over to
Urban Scarlet for a real blog tutorial. I basically followed her tutorial, substituting fishing line for the illusion cord. You can find this in the jewelry section of any hobby/craft supply store. I bought mine at Hobby Lobby for around $3. You can find dowel rods in the wood crafting section. I used a dowel rod from Wilton that I had laying around for stabilizing multi tier cakes, because I make those
all the time occasionally one time like 6 years ago. If you want to dye your doilies,
Easy Makes Me Happy has a simple tutorial using Rit Dye. Or if you're like me, buy them ready made from
Rachael's Scraps on Etsy. She has beautiful colors, reasonable prices, and quick delivery. For instance:
 |
| Love Love Love. |
Step Two: Lay your doilies out on wax paper ala
Urban Scarlet's tutorial and "paint" your doilies with fabric stiffener using a foam brush. Let dry overnight.
 |
| Note: Rinse your doilies before "painting" to avoid color changes. |
|
Step Three: Arrange your doilies. I took pictures to test various arrangements.
 |
| Ah... The One. |
|
|
|
Step Four: Tie on each doily. Say "Frack", "Blurgh" and "Shark Farts" as appropriate (anytime you accidentally untie, tie, drop, or otherwise mishandle the tiny invisible string that is illusion cord).
Step Five: Stop for a snack.
Step Six: Stop again whenever your kid looks like this.
Resume when your kid looks like this.
About 17 naps later (or 2 if you're are a person with a decent attention span), use some illusion cord to make a "hanger" for your sun catcher-mobile and tack it up!
Yayyyyy! The end!


